Webhook
A webhook lets you automatically send data from this system to another system when a specific event happens. In this case, the webhook is triggered when an agenda is completed.
You can use this to send user data to your own database, internal tools, or any third-party service that can accept incoming POST requests.
How to Set Up
Using the “Generate API Configuration” Helper
You can use this tool to auto-build your webhook request from either a cURL command or a short plain-English description. It saves time and prevents typos when filling Method, URL, Headers, Query Params, and Body.
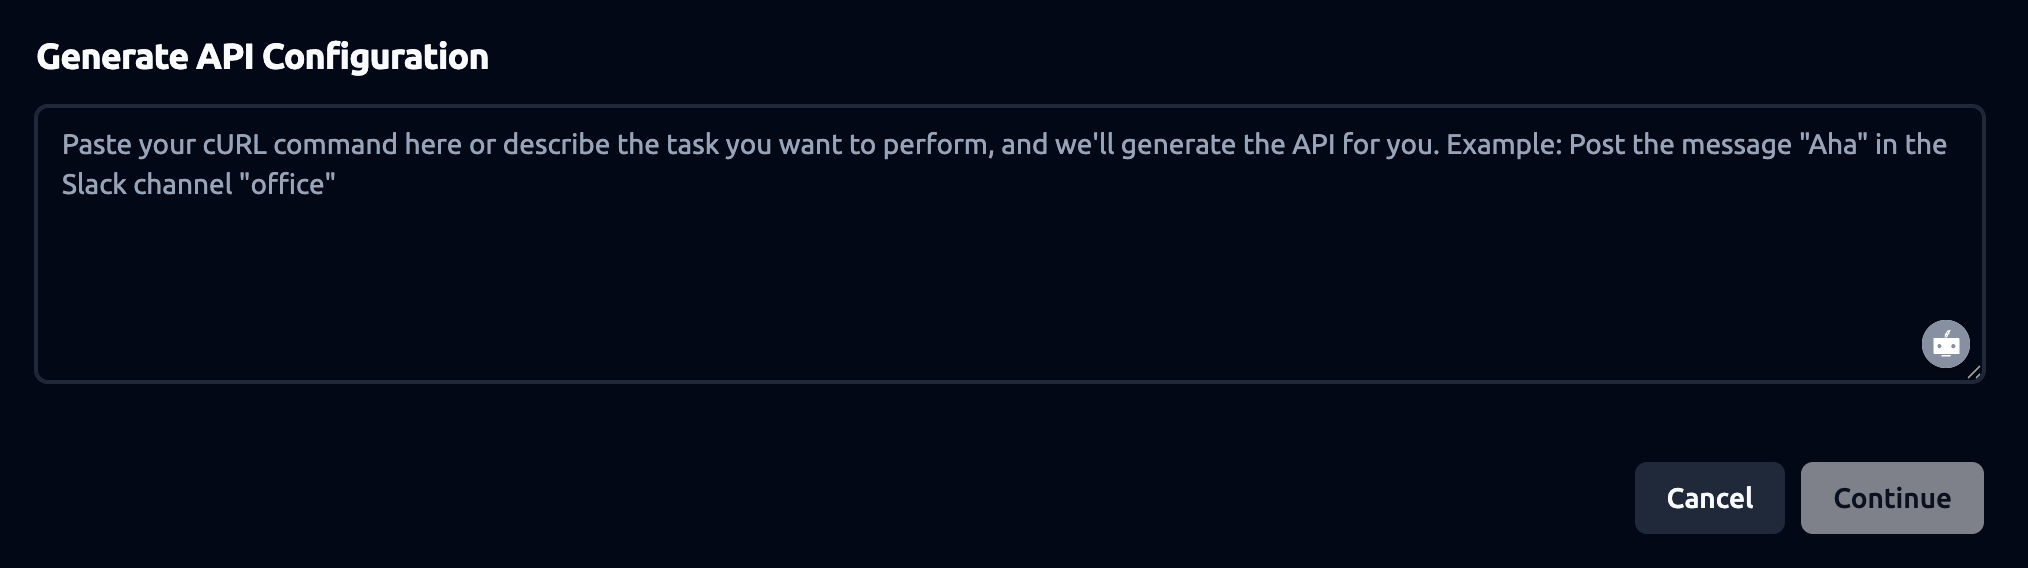
How to use
-
Click Generate API Configuration.
-
In the textbox:
-
Option A — Paste a cURL that represents the request you want us to make. Include -X (method), full URL, all -H headers, and -d body.
-
Option B — Describe the request in plain English. Example: “POST agenda completion details to https://hooks.zapier.com/xxx as JSON with event, occurred_at, conversation.id, summary, and link.”
-
Click Continue.
-
Review the populated Method, URL, Headers, Body in the webhook form.
-
Replace placeholders (tokens, IDs, URLs) with your real values.
-
(If JSON) click Beautify JSON to format the payload.
-
Click Save Changes.
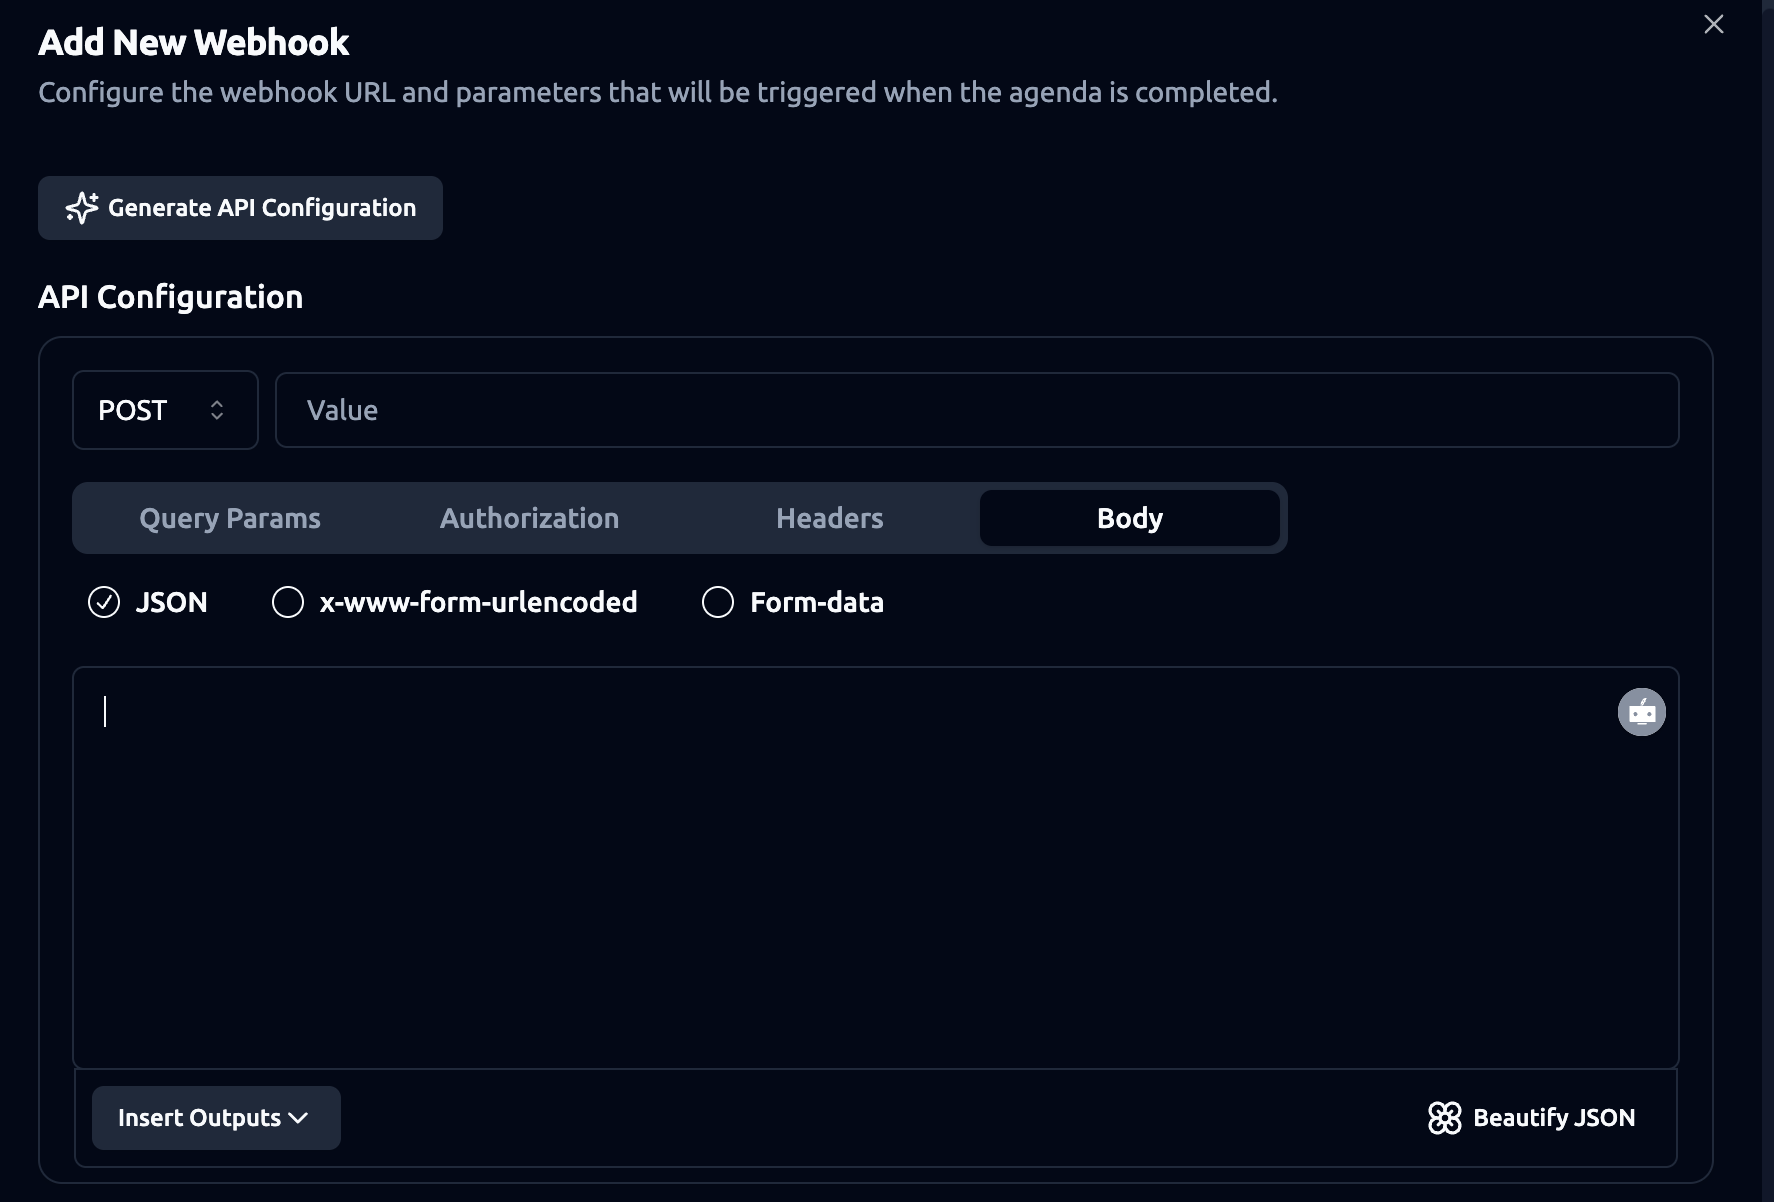
Configure the Webhook on your own
- Open Webhook Configuration
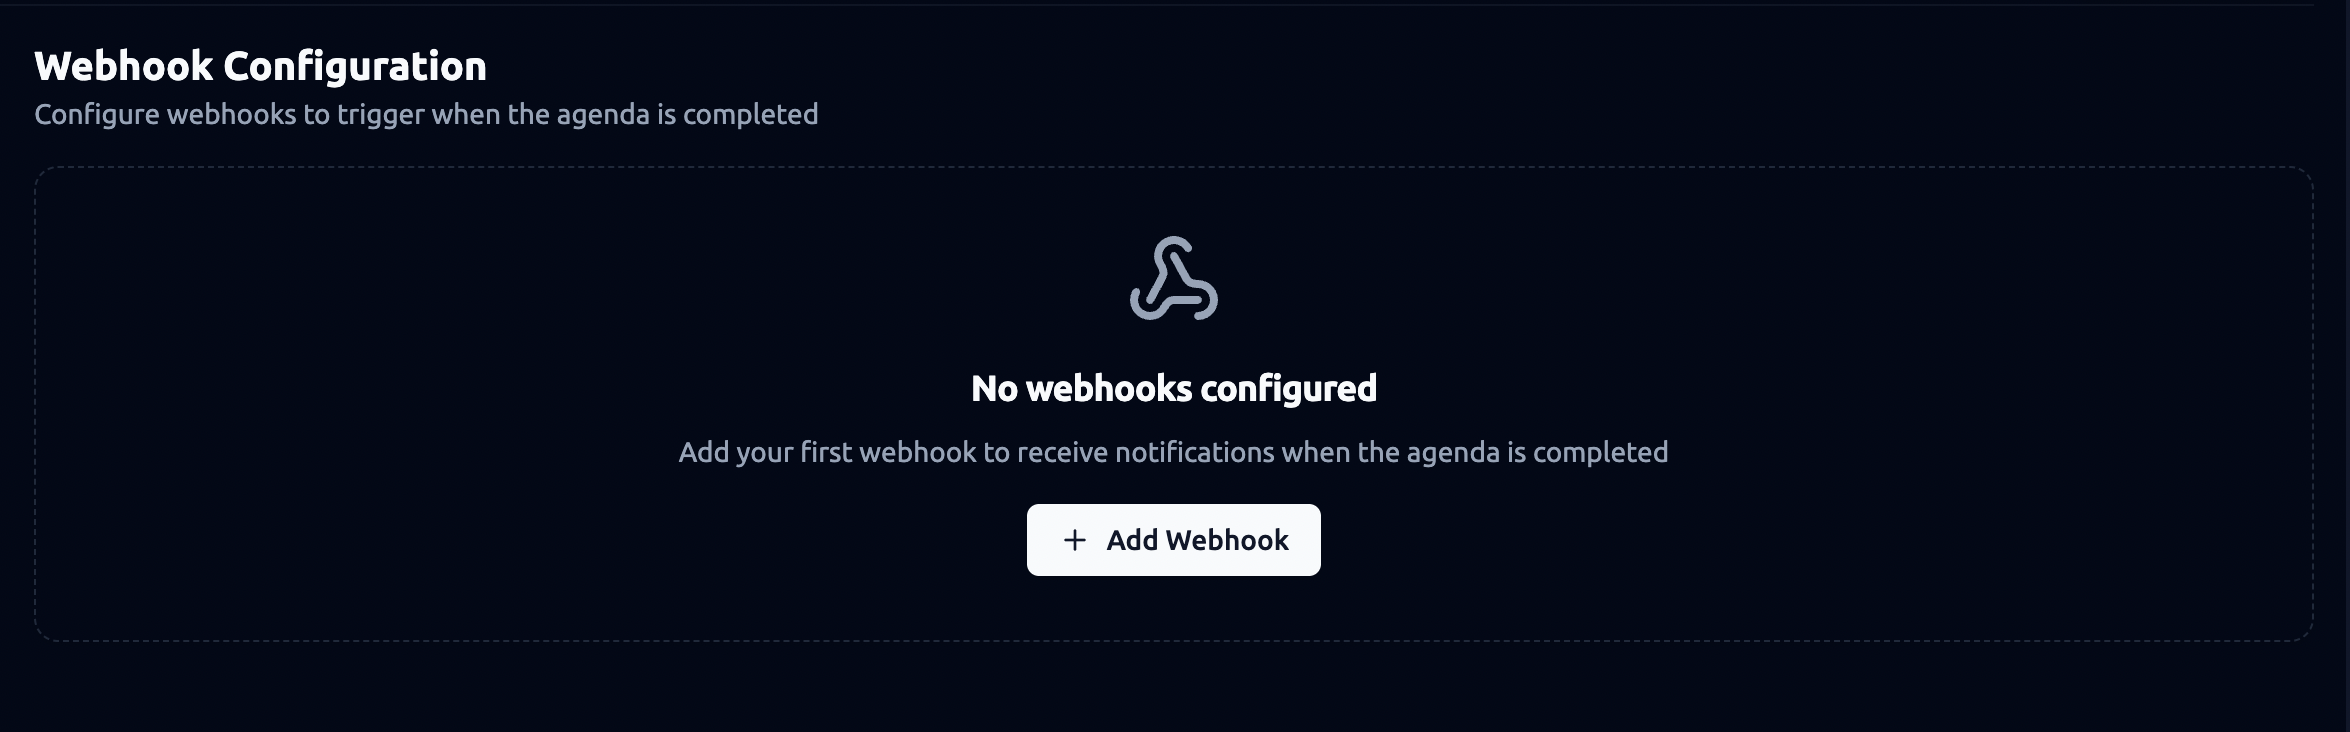
Go to the Webhook Configuration section in the platform.
Click “Add Webhook”. You’ll see a form to create a new webhook.
-
Configure the Webhook
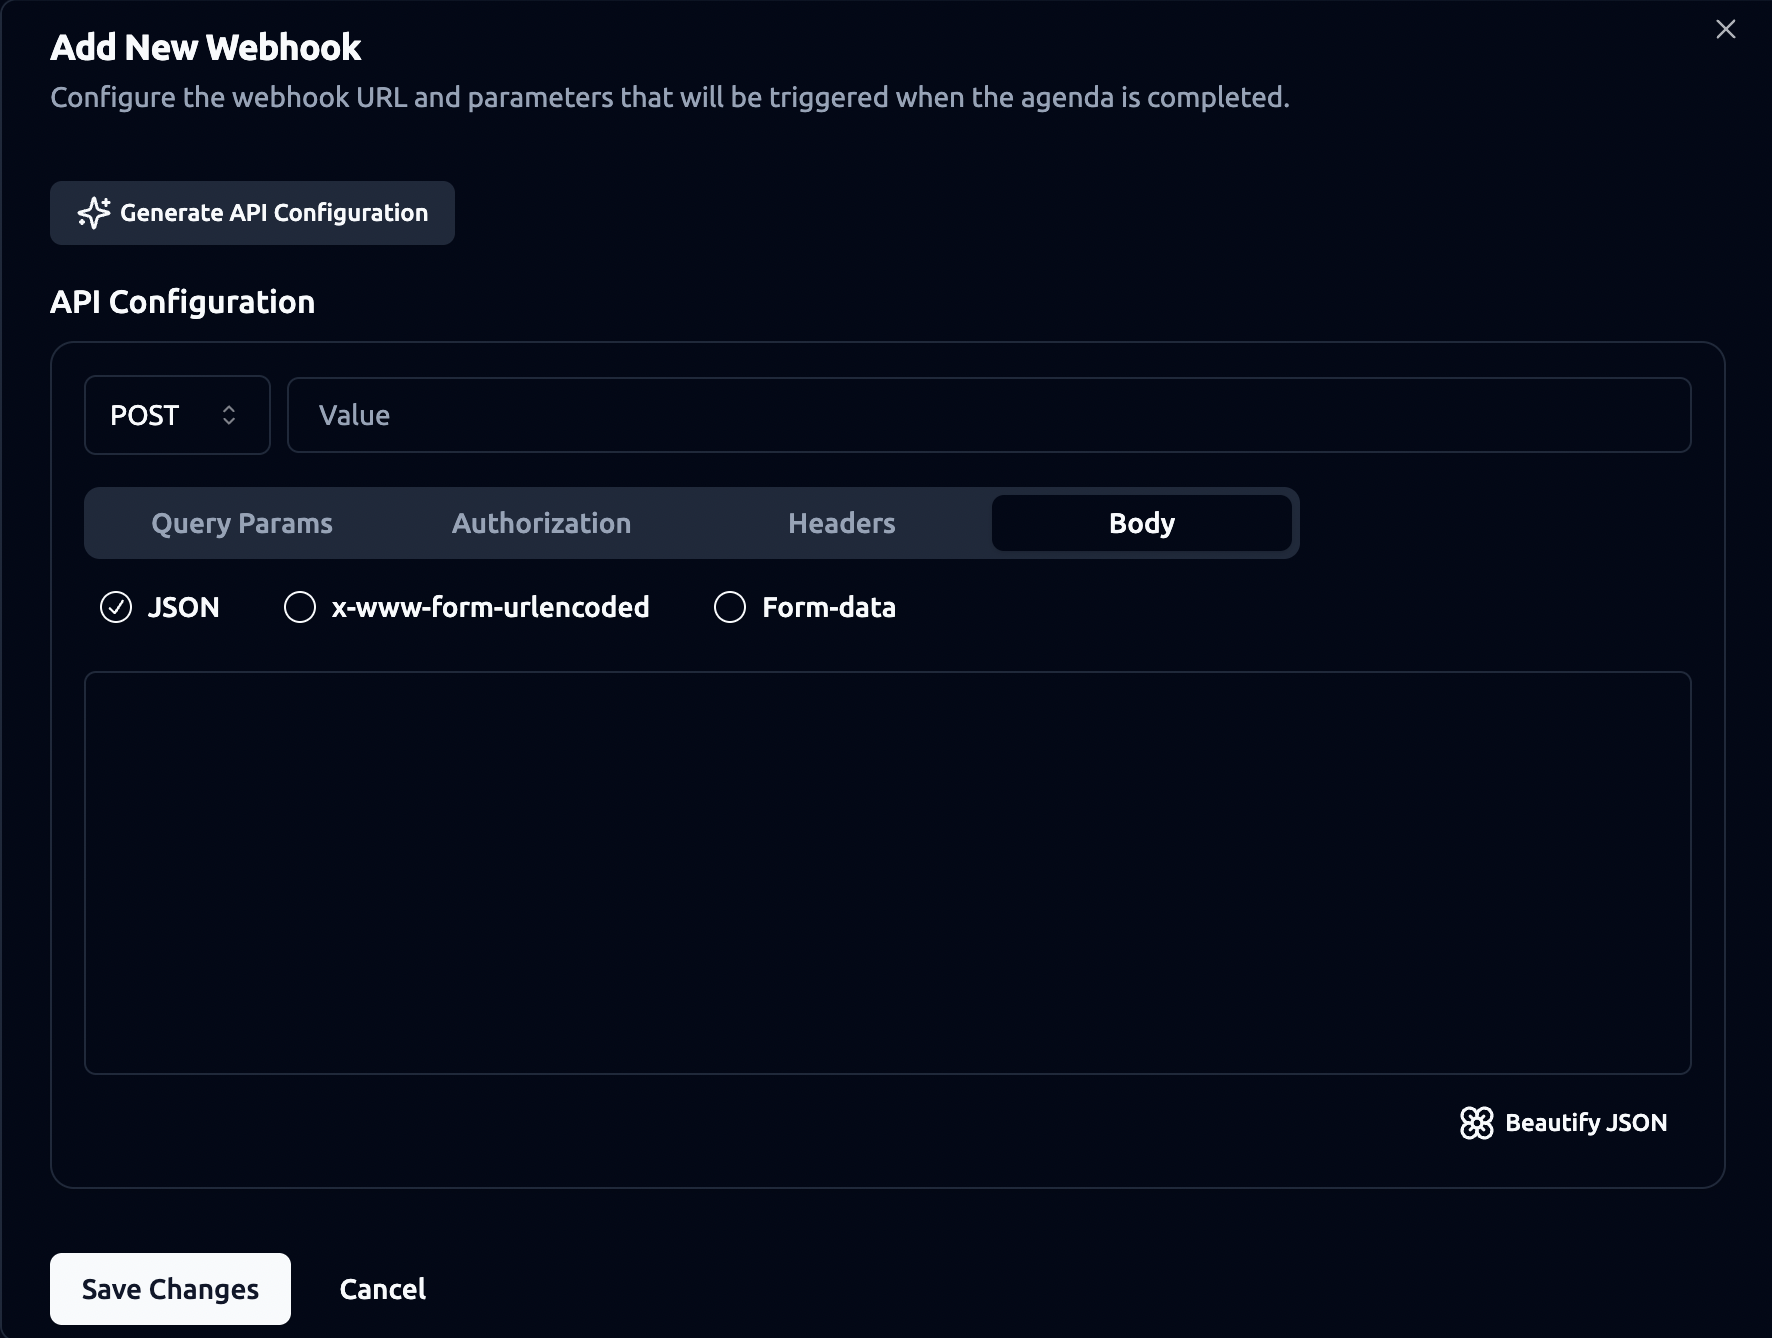
Method and URL
-
Set the method to POST (used to send data).
-
Enter the URL where you want the data to be sent. This should be an endpoint you or your team controls.
Body Format
-
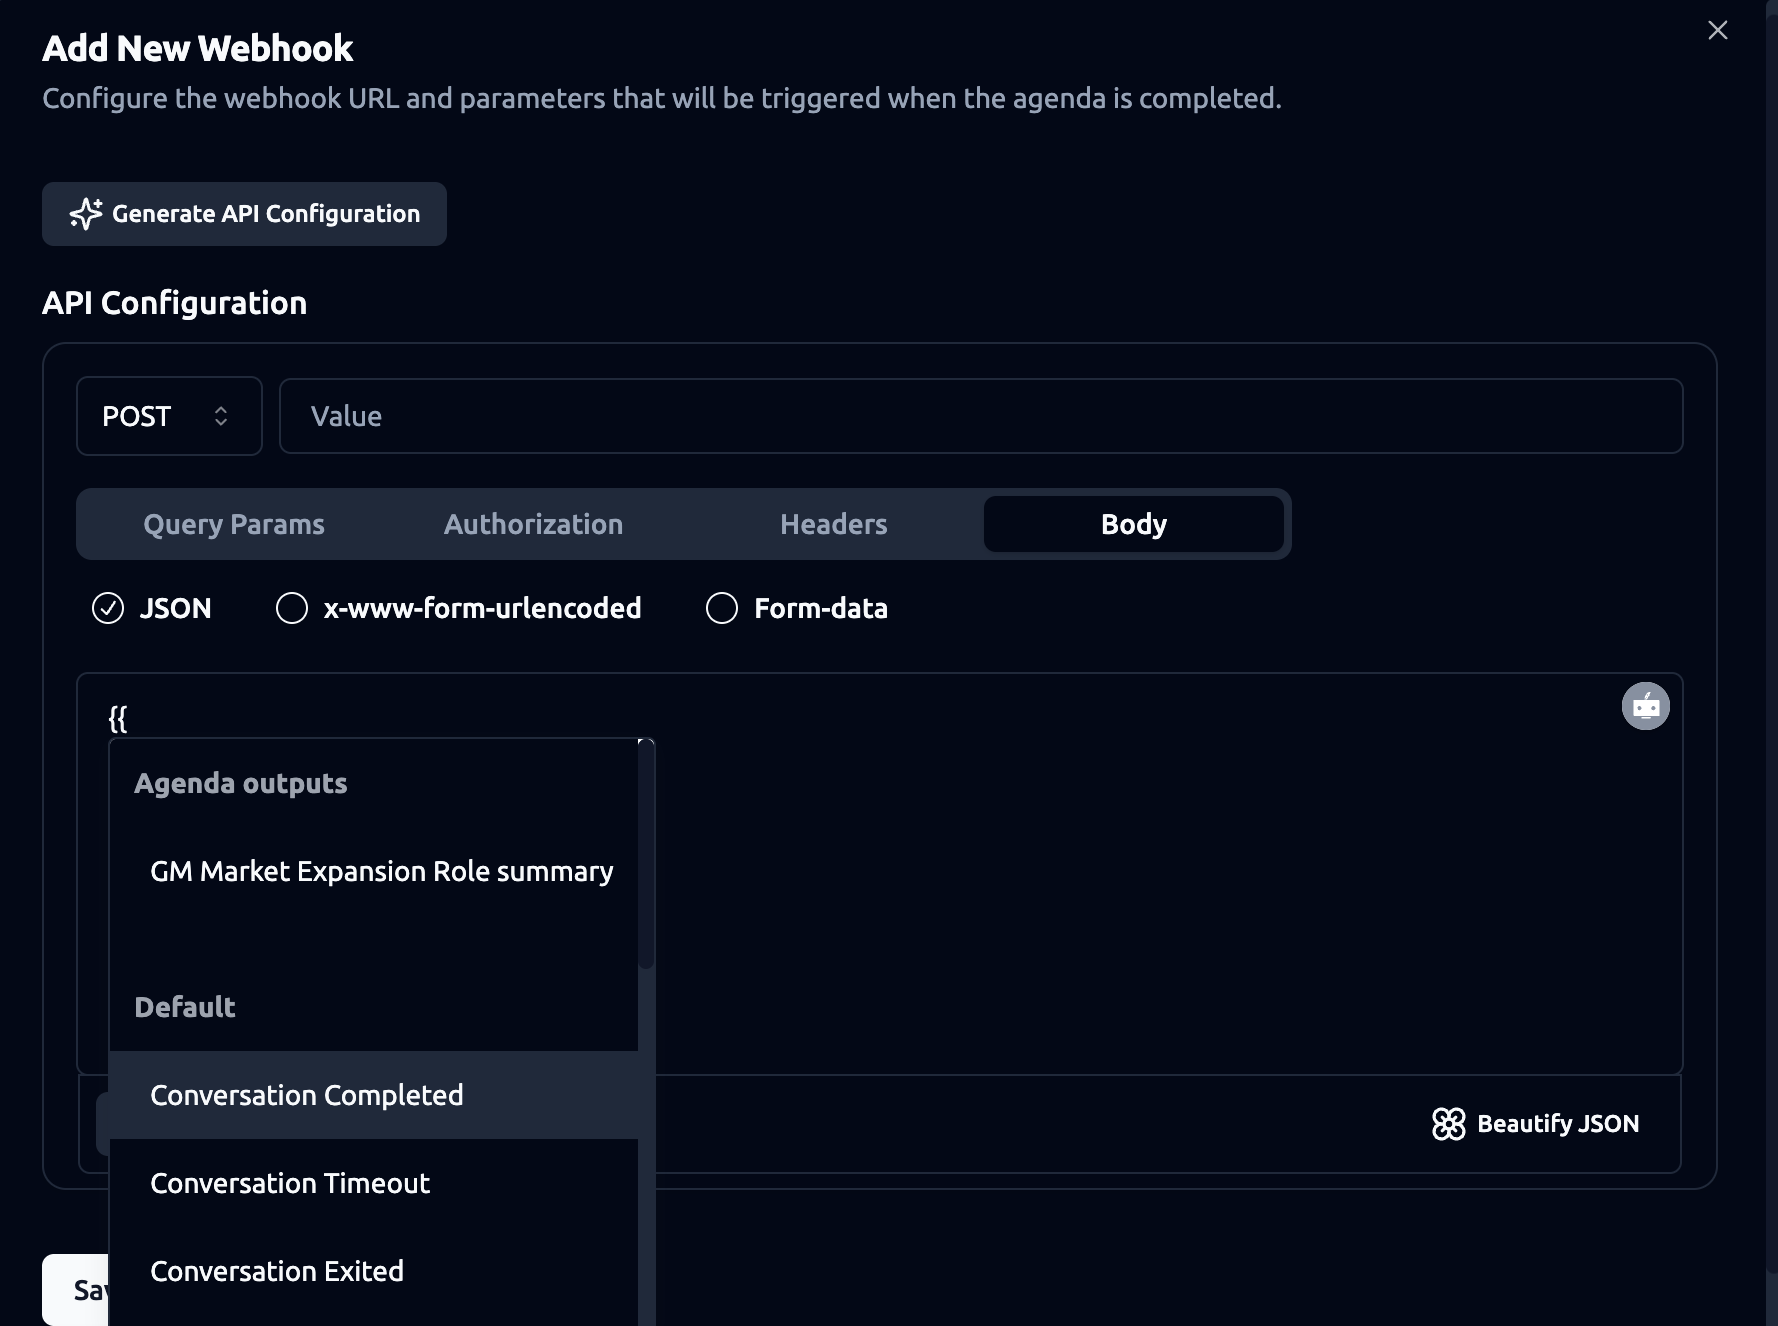
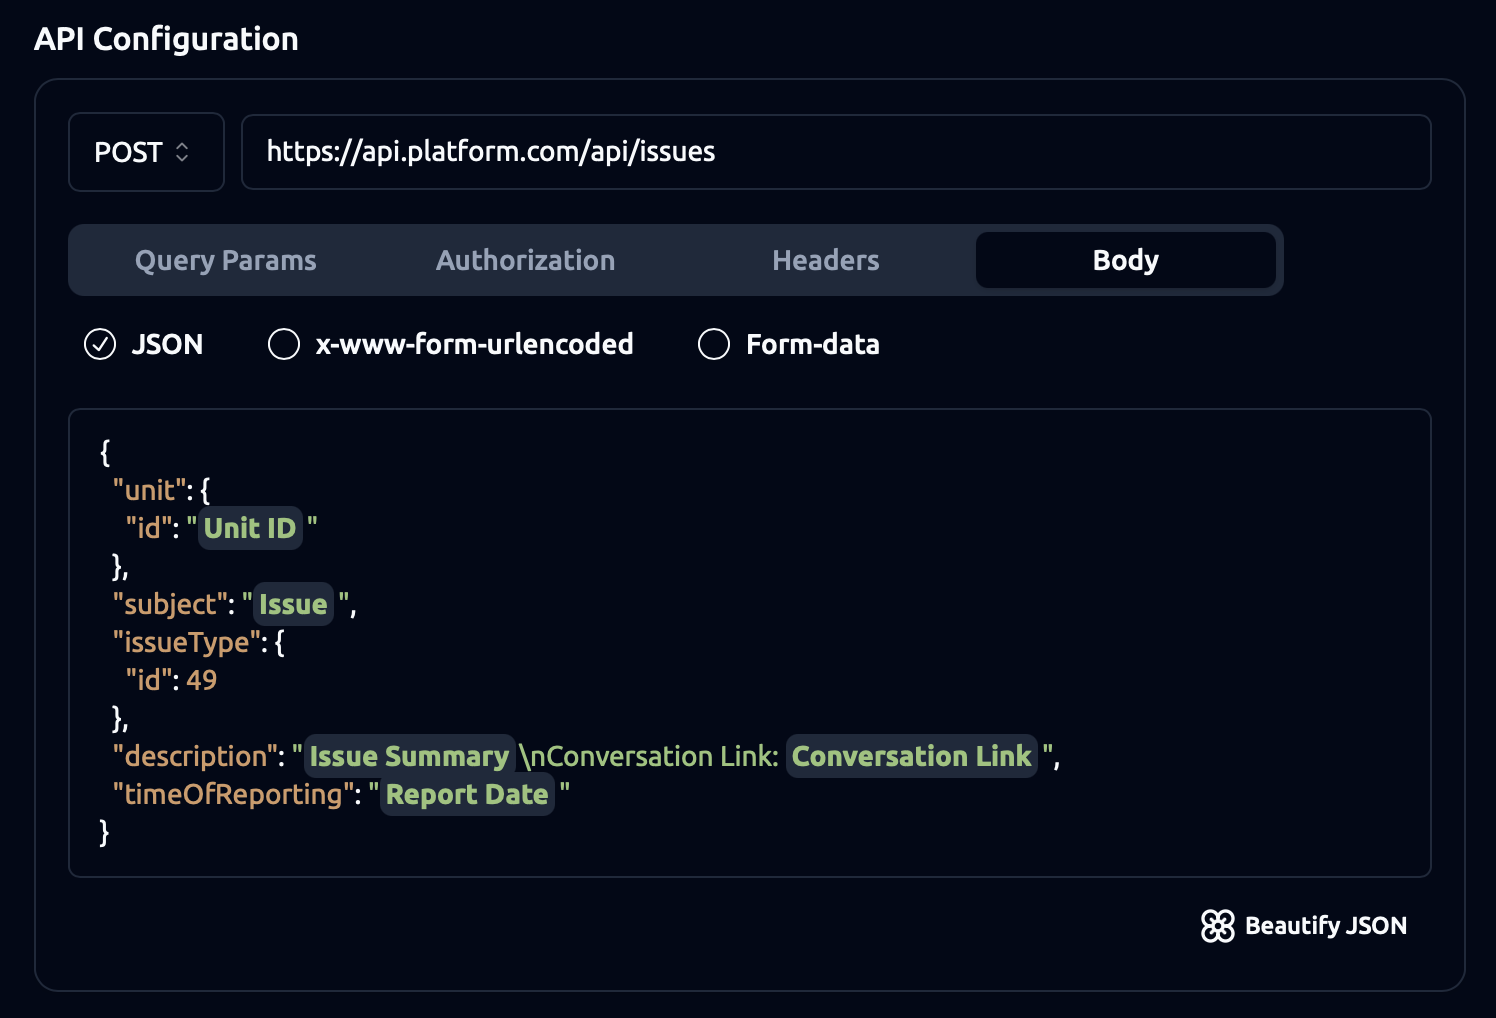
Under the Body tab, choose JSON (recommended for most APIs).
-
Enter the JSON body you want to send.
-
You can dynamically map agenda outputs into the webhook request by using the Insert Outputs button to add placeholders (you can choose from Agenda Custom Outputs, Scoring Outputs or Default Outputs.) To insert outputs, click on the JSON configuration box and use the Insert Outputs button to choose from the available outputs.
(Optional) Add Headers or Authorization: If your endpoint needs an API key or token, go to the Authorization tab to add it.
You can also add custom headers if required by your API.
-
-
Save the Webhook
Once everything is filled in, click “Save Changes”.
Your webhook is now active. Every time an agenda is completed, the system will send a POST request to the specified URL with the data you defined.
“Generate API Configuration” Helper
You can use this tool to auto-build your webhook request from either a cURL command or a short plain-English description. It saves time and prevents typos when filling Method, URL, Headers, Query Params, and Body.
How to use
-
Click Generate API Configuration.
-
In the textbox:
-
Option A — Paste a cURL that represents the request you want us to make. Include -X (method), full URL, all -H headers, and -d body.
-
Option B — Describe the request in plain English. Example: “POST agenda completion details to https://hooks.zapier.com/xxx as JSON with event, occurred_at, conversation.id, summary, and link.”
-
Click Continue.
-
Review the populated Method, URL, Headers, Body in the webhook form.
-
Replace placeholders (tokens, IDs, URLs) with your real values.
-
(If JSON) click Beautify JSON to format the payload.
-
Click Save Changes.
Tips
-
Use a webhook if:
-
You want to send data (e.g. candidate information) to your own system in real time.
-
You need to store, process, or analyze the results of completed agendas elsewhere.
-
You’re integrating this platform with another tool that requires incoming data.
-
-
Make sure your receiving endpoint is working and can accept POST requests with JSON.